Track Manager: Difference between revisions
No edit summary |
No edit summary |
||
| (One intermediate revision by one other user not shown) | |||
| Line 1: | Line 1: | ||
<div class="noprint"> | |||
==Introduction== | |||
</div> | |||
The Track is the result of the compositing of the Layer Manager. By default there are two tracks and in each track 8 layers to use in your workspace. <br> | The Track is the result of the compositing of the Layer Manager. By default there are two tracks and in each track 8 layers to use in your workspace. <br> | ||
<div class="noprint"> | |||
==Features== | |||
</div> | |||
There are different output tracks. The red-colored track is active for editing; corresponding layers are visible for processing. <br> | There are different output tracks. The red-colored track is active for editing; corresponding layers are visible for processing. <br> | ||
The maximum number of tracks in MXWendler is 4 and each can host up to 16 layers. | The maximum number of tracks in MXWendler is 4 and each can host up to 16 layers. | ||
| Line 11: | Line 17: | ||
''Tip: the Track Manager panel can be dragged and positioned anywhere on the software's user interface. Minimizing the window (clicking on the triangle) will bring the window to its default position.'' | ''Tip: the Track Manager panel can be dragged and positioned anywhere on the software's user interface. Minimizing the window (clicking on the triangle) will bring the window to its default position.'' | ||
[[file: | [[file:TrackManager_V7.png|728px]] | ||
Latest revision as of 14:50, 18 October 2023
The Track is the result of the compositing of the Layer Manager. By default there are two tracks and in each track 8 layers to use in your workspace.
There are different output tracks. The red-colored track is active for editing; corresponding layers are visible for processing.
The maximum number of tracks in MXWendler is 4 and each can host up to 16 layers.
These settings can be changed in the Settings menu under:
- Settings → Windows → Misc.
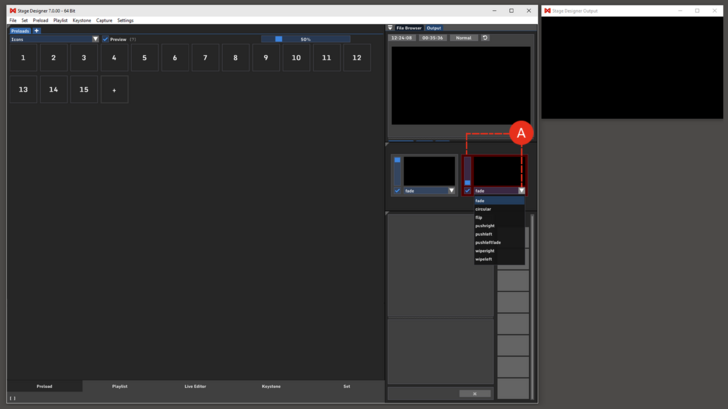
By selecting the checkbox under each track a Crossfade can be activated. (A)
The transition mode can be chosen from the menu on the side of the checkbox.
Tip: the Track Manager panel can be dragged and positioned anywhere on the software's user interface. Minimizing the window (clicking on the triangle) will bring the window to its default position.
