Tutorial Masked Output: Difference between revisions
No edit summary |
No edit summary |
||
| Line 18: | Line 18: | ||
{{#mpdftags: pagebreak}} | |||
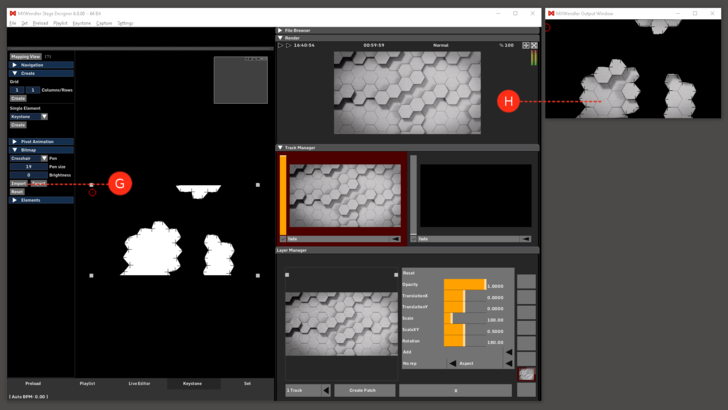
5. The finished mask is opened again after it is saved. Select 'Import from Picture' to load the mask. '''(G)''' | 5. The finished mask is opened again after it is saved. Select 'Import from Picture' to load the mask. '''(G)''' | ||
Revision as of 15:20, 3 June 2019
In this tutorial, an output mask will be created for a defined setup with a video projector. An image editing program (e.g. Photoshop / Gimp) must be used here.
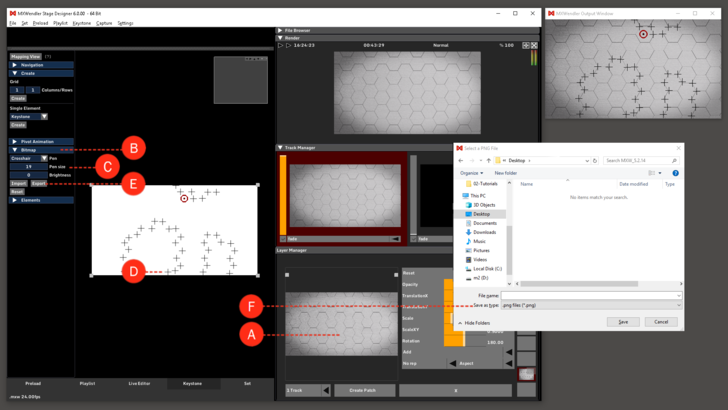
1. The selected video is loaded into the 'Preload' and active in the Layermanager. (A)
2. Go to the 'Bitmap' Submenu in the Keystone Tab. (B)
3. Select 'Crosshair' in the 'Brush' settings. The size of the Crosshair can be adjusted in the Brush Size settings. (C)
4. Specific selected points can be marked with Crosshair. (D)
With 'Export to Picture' the resulting graphic can be exported as an image. (E)
The graphic is stored as .png file on the desktop for the next step - processing into a mask in an image editor. (F)
| Tooltip: Masked outputs are an extremely effective tool for difficult projection projects.
Of course, masks can also contain color values and gray values. The mask is multiplied on the final output. |
{{#mpdftags: pagebreak}}
5. The finished mask is opened again after it is saved. Select 'Import from Picture' to load the mask. (G)
The mask is now active in the output window. (H)

