Tutorial Playlists with Supertitles: Difference between revisions
| Line 42: | Line 42: | ||
[[File:20_S49.png|728px]] | [[File:20_S49.png|728px]] | ||
==Creating Supertitles | ==Creating Supertitles Using a Wizard== | ||
Revision as of 13:52, 30 September 2019
In this tutorial, a composition with supertitles is created. Supertitles are an important feature for theatres and operas, e.g. to display text translations to the audience. Another appliance is to display song lyrics, for example, a chorus.
Supertitle Specifics
Literally, thousands of supertitles can apply to a single playlist, making it inefficient to store each playlist-controlled Supertitle in its own preload location. For efficiency, MXWendler creates one internal preload for all the playlist supertitles in one individual show. As a technological consequence, supertitles have some characteristics:
- The size, font and colour of such supertitles can only be set once in the media settings.
- Playlist-triggered supertitles have no own effects and translations as e.g. scaling, rotation.
- Preload-triggered supertitles can have their own effects and translations.
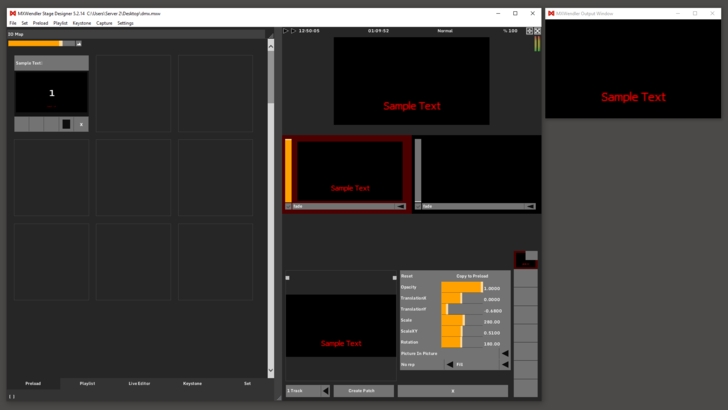
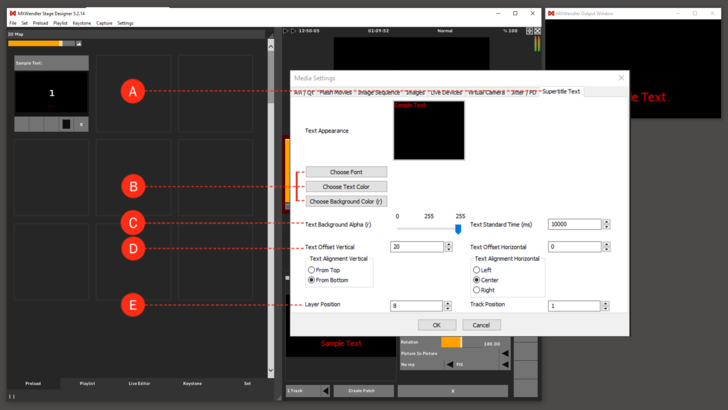
- Menu: Settings → Media → Supertitles Text
2. Choose 'Font', 'Font Size', 'Text Color' and ' Text Background Color'. (B)
- Changing the background colour requires an application restart.
3. Adjust the 'Text Background Transparency' (Alpha). (0 = completely transparent). (C)
4. Define the 'Text Alignment' (from top, from bottom, left, center, right). (D)
5. Define the 'Layer Position' and 'Track Position'. Usually, the text is located on the top layer (layer 8). (E)
- To apply the settings, restart the Playlist.
Manually Creating Supertitles in the Playlist
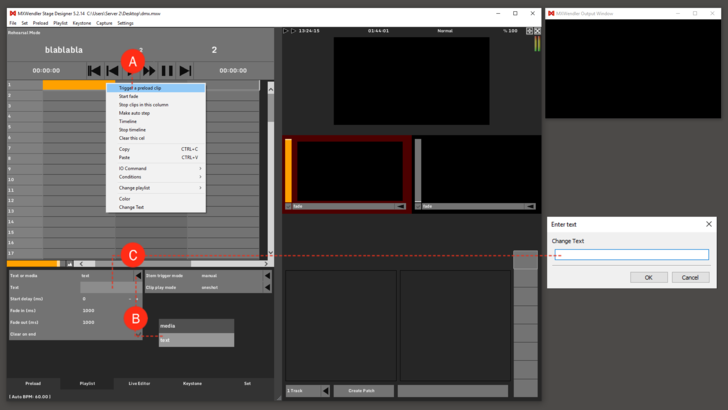
Simply select a playlist item, insert a preload element and choose ‘text’:
1. Right-click on a Playlist Cell and select ‘Trigger a Preload Clip’.(A)
2. Select cell.
3. In the cell properties Text or Media, select ‘Text’.(B)
4. Double–click the text preview box below type choice and enter a text. (C)
The text will be displayed as a Supertitle in the chosen playlist cue.
Creating Supertitles Using a Wizard
In cases that you might have hundreds of text lines, it is sometimes easier to create a text file first and then insert it into the playlist using a wizard. The text file is simple to create, but it should follow specific rules.
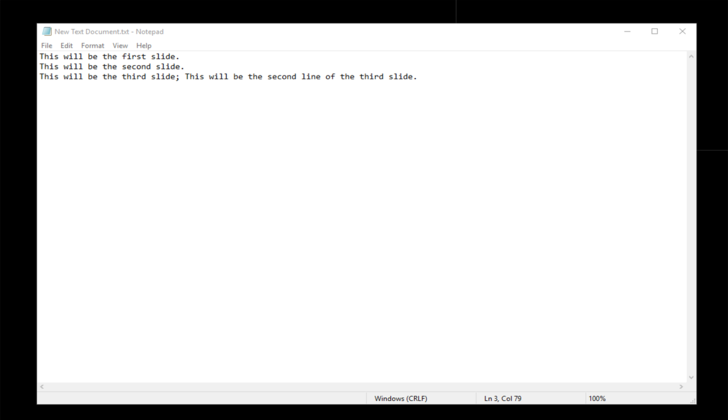
- Each line in the text file will create one text slide.
- If the text file line contains a semicolon, it will insert a new line in the text slide.
Example text file:
- This will be the first slide.
- This will be the second slide.
- This will be the third slide; This will be the second line of the third slide.
{{#mpdftags: pagebreak}} Once you have created such a text file, you can import it using the Playlist Wizard.
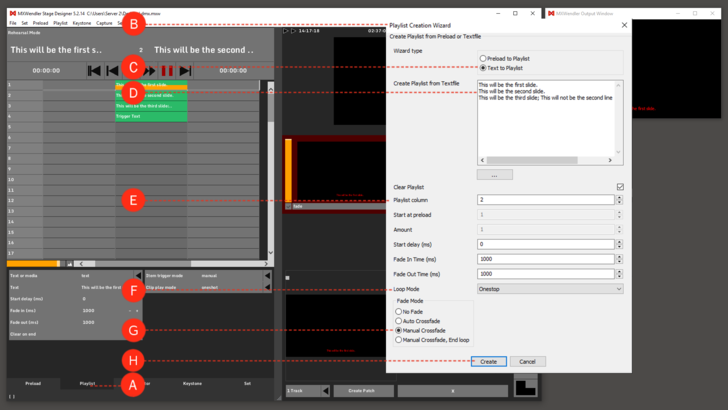
1. Switch to the Playlist Tab. (A)
2. Open the 'Playlist Wizard'. (B)
- Menu: Playlist → Playlist Wizard
3. Set the Wizard Type to 'Text to Playlist'. (C)
4. Copy the created text file into the text area or type it in manually. Every line will be on one slide. Use Semicolon ‘;’ for multiline-slides. (D)
5. Define the 'Playlist Column' in which the text should appear. (E)
6. Set the Loop Mode to 'Oneshot'. (F)
7. Set the Fade Mode to 'Manual Crossfade'. (G)
8. Click on 'Create' to apply the settings. (H)
The Slides are now in the Playlist and can be played back with ► Play.
