Tutorial Masked Output
In this tutorial, an output mask will be created for a defined setup with a video projector. An image editing program (e.g. Photoshop / Gimp) must be used here.
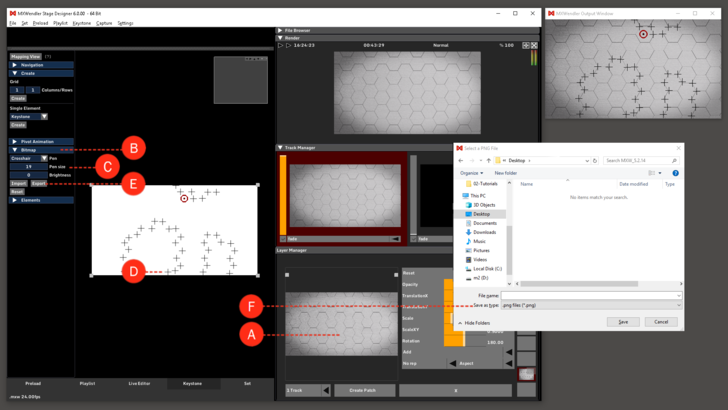
- - A - The selected video is loaded into the 'Preload' and active in the Layermanager.
- - B - Go to the 'Bitmap' Submenu in the Keystone Tab.
- - C - Select 'Crosshair' in the 'Brush' settings. The size of the Crosshair can be adjusted in the Brush Size settings.
- - D - Specific selected points can be marked with Crosshair.
- - E - With 'Export to Picture' the resulting graphic can be exported as an image.
- - F - The graphic is stored as .png file on the desktop for the next step - processing into a mask in an image editor.
| Tooltip: Masked outputs are an extremely effective tool for difficult projection projects.
Of course, masks can also contain color values and gray values. The mask is multiplied on the final output. |
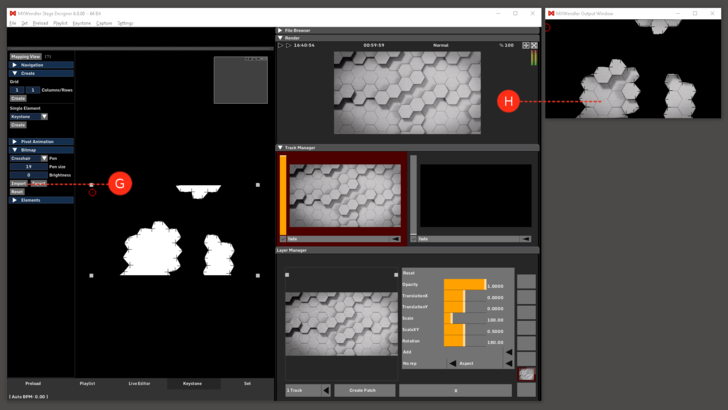
- - G - The finished mask is opened again after it is saved. Select 'Import from Picture' to load the mask.
- - H - The mask is now active in the output window.

