Tutorial Playlists with Timecode: Difference between revisions
Jump to navigation
Jump to search
No edit summary |
No edit summary |
||
| Line 1: | Line 1: | ||
This tutorial applies to all different OS and MXWendler versions. | This tutorial applies to all different OS and MXWendler versions. Please note that the screenshots are made with Version 5 User Interface. Version 6 users please consider the differences in Version 6 [[Playlist]]. | ||
<div class="noprint"> | <div class="noprint"> | ||
== Introduction== | == Introduction== | ||
Latest revision as of 16:21, 3 November 2020
This tutorial applies to all different OS and MXWendler versions. Please note that the screenshots are made with Version 5 User Interface. Version 6 users please consider the differences in Version 6 Playlist.
You can adapt the playlist to listen to timecode.
Activating Timecode
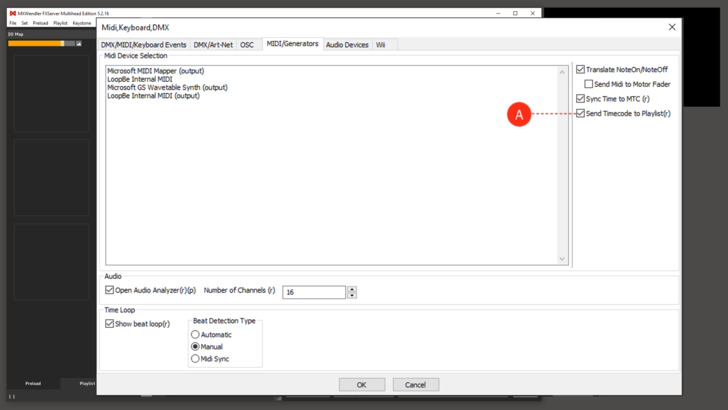
To make MXWendler listen to a timecode, you must first activate MTC Listening first (A):
1. Enable a Midi Device:
- Settings → IO → Midi General → Devices → restart
2. Enable MTC Listening:
- Settings → IO → Midi General → MTC → restart (Sync Time to MTC is not required for this function)
Using Timecode
MXWendler now receives MTC timecode. To use the timecode in the playlist, you must enter the timecodes in the playlist.
1. Open the Playlist Tab.
2. Double-click on the left-most column, the 'Comment Column'.
3. Enter a timecode such as 00:00:00:01 (hh:mm:ss:frame). (B)
The playlist now responds to MTC. Follow these rules when using MTC:
- You do not have to enter MTC in each playlist row
- You can freely mix timecodes, meaning that earlier times can appear later in the playlist

