Tutorial Colored Output with Animations
In this tutorial, a coloured output is created in the keystone tab and the output correction is animated.
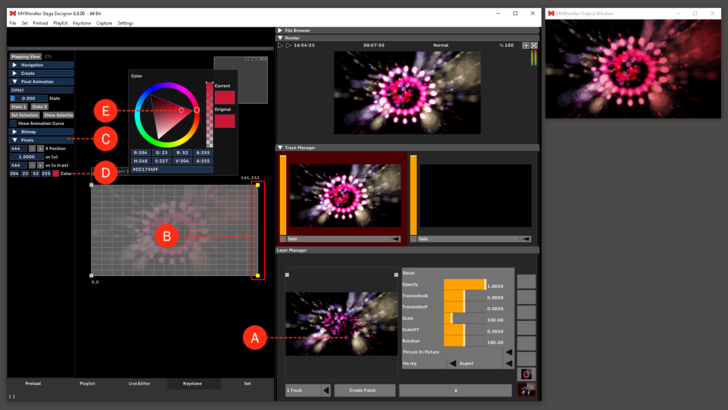
1. Open the desired video in the Layermanager. (A)
2. Switch to the Keystone Submenu 'Keystone'. Mark the two pivots on the right. (B)
3. Open the Submenu 'Pivot'. (C)
4. Select the option 'Color' in the dropdown menu. (D)
5. Double-Click onto the Color Wheel and select the desired colour in the 'New Color' Window. (E)
Colouring can be carried out with one or more markers. Different areas can also be coloured with different colours.
{{#mpdftags: pagebreak}}
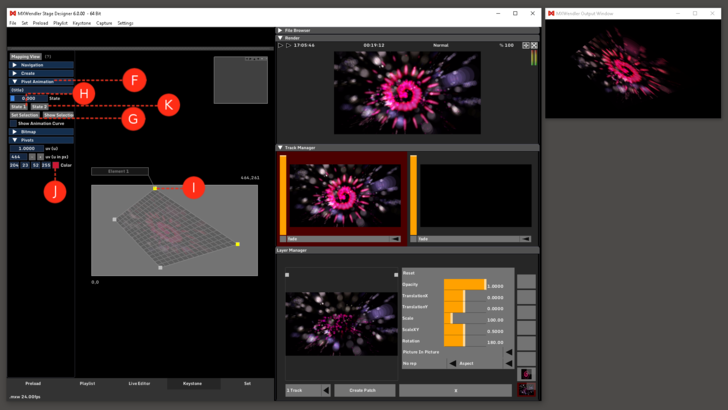
6. Open the Submenu 'Animation'. (F)
7. Click 'Set Selection' to activate the highlighted pivots. Bring the marked pivots to the start position of the animation. (G)
8. Click 'State 1' to determine the start position for the animation. (H)
9. Bring the marked pivots to the end position of the animation. (I)
10. Switch to the Submenu 'Pivot' and this time colorize differently. (J)
11. Switch back to the Submenu 'Animation', click State 2 to determine the end position of the animation. (K)
{{#mpdftags: pagebreak}}
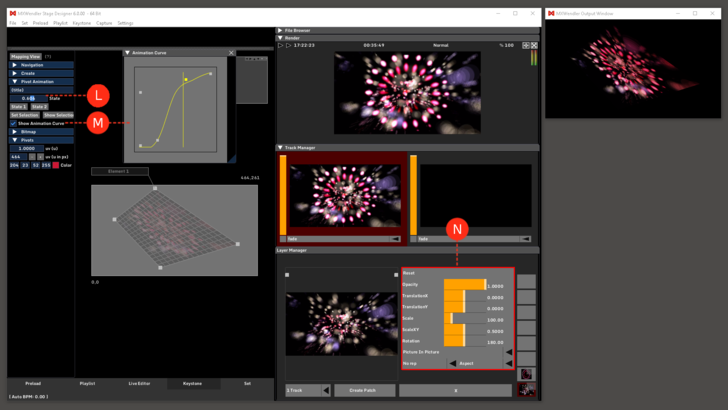
12. The animation can be retrieved with the slide control in the Keystone Submenu 'Animation'. (L)
13. Use the yellow Animation Curve to alter the algorithm of the attack curve. (M)
14. Changes can be made at any time in 'Layermanager'. The final position of the animation can also be changed. (N)


