Tutorial Playlists with Timeline
This tutorial applies to all different OS and MXWendler versions. Please note that the screenshots are made with Version 5 User Interface. Version 6 users please consider the differences in Version 6 Playlist.
In this tutorial, a playlist is created in which the clip characteristics can be controlled over a timeline. First, load the desired media files into the Preload and create a Playlist.
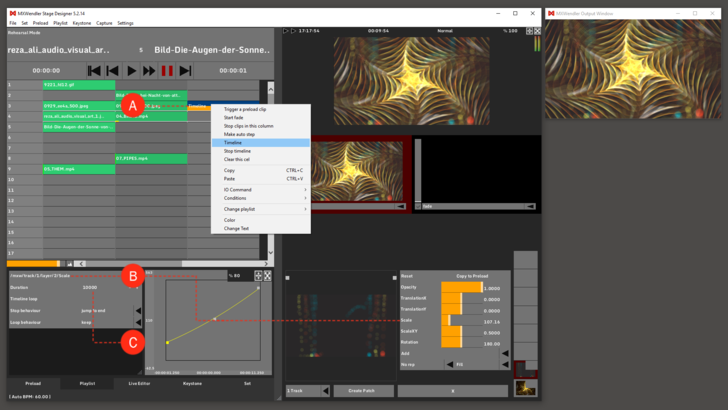
1. Insert a 'Timeline' into an empty cell next to the desired clip. (A)
2. Define the 'Receiver' of the timeline, e.g. the clip characteristic 'Scale'. (B)
3. Define the 'Duration' of the timeline characteristic with ‘+’ / ‘-’. Double-click on the value to type it in numerically. (C)
Tip: The addressing of the receiver is always carried out over the track and the corresponding layer. Therefore it is necessary to observe, on which track and layer the clip is located when the complete playlist is played back. Layers might disappear when connected to the Timeline Receiver because the modulator is set to 0 (starting point of the timeline).
{{#mpdftags: pagebreak}}
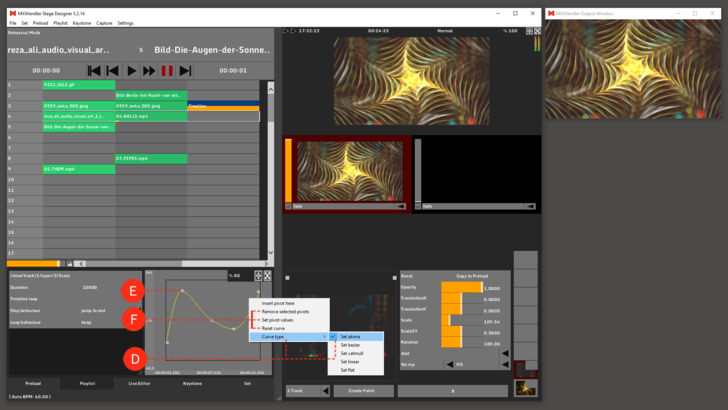
4. Select the 'Curve Type' of the timeline, e.g. 'Set Akima'. (D)
- Right-Click onto the curve → Curve Type → Set Akima
5. Modify the Curve by dragging the pivots. The pivot turns yellow when activated. Double-Click onto the curve to add more pivots. (E)
6. Right-Click onto the curve to 'Delete selected Pivots', 'Set Pivot Values' or 'Reset Curve'. (F)
The modifications become active as soon as the cue/the playlist is played back again.

